Having worked across retail parks, industrial estates, commercial forecourts and housing developments, we’ve seen what separates a durable resurfacing job from one that starts cracking again before the line markings have had time to fade. It comes down to process — consistently, every time.
Here’s a detailed, honest account of how tarmac resurfacing works from the first assessment through to the finished surface.
Why Resurfacing Becomes Necessary
Tarmac is a resilient material, but it doesn’t last indefinitely. In a car park or commercial access road context, you’re dealing with a combination of factors that degrade the surface over time: repeated loading from vehicles (including the occasional HGV cutting through from a delivery bay), thermal expansion and contraction through seasonal temperature swings, water ingress through micro-cracks, and the general oxidation of the bitumen binder that makes the surface brittle as it ages.
The visible signs — cracking, ravelling (where aggregate starts to loosen from the surface), rutting in high-stress areas like turning circles and entrance points, and full pothole formation — are usually the end result of a process that’s been developing quietly for years underneath. By the time you’re seeing widespread cracking or deformation, patching individual areas is rarely the right answer. The structural integrity of the whole surface is compromised, and spot repairs will keep failing because the root cause hasn’t been addressed.
That’s when resurfacing becomes the correct, cost-effective solution.
Stage 1: Site Assessment and Survey
Before any machinery arrives on site, a proper resurfacing job begins with a thorough surface assessment. This isn’t just a walk-around with a clipboard — it involves evaluating the existing pavement structure to understand what you’re working with.
The key questions at this stage are: is the existing base (sub-base and binder course) still structurally sound, or has failure gone beyond the surface course? Are there areas of standing water indicating drainage issues that will need addressing before or during the works? Are there utility covers, kerb lines or drainage channels that need to be accommodated in the new levels?
If the base layers are intact and the failure is confined to the wearing course — which is the most common scenario in a car park that’s been reasonably maintained — then a surface-course overlay or mill-and-resurface is appropriate. If there’s evidence of sub-base movement or significant deformation at depth, that changes the scope considerably.
A written assessment and clear scope of works at this stage protects both the contractor and the client. It means there are no surprises mid-job, and the specification is grounded in what the surface actually needs rather than what’s cheapest.
Stage 2: Traffic Management and Site Setup
Resurfacing a live car park or access road isn’t like working on a closed road. People are still trying to park. Deliveries still need to happen. And your crew is working with hot materials and heavy machinery in a space where members of the public can wander in.
The traffic management requirements depend on where you’re working. On private land — retail parks, industrial estates, commercial car parks — the landowner controls access, and a competent contractor can manage the working area using their own traffic management without formal statutory consent. This is exactly the approach used on the job shown in these photographs: the team deployed cones and managed vehicle movements themselves, keeping the site safe without the need for a formal TM scheme. On a public highway, however, it’s a different matter entirely — a formal traffic management plan, compliance with Chapter 8 of the Traffic Signs Manual, and in many cases a Section 50 or Section 58 licence are all required before work begins.
Getting this right at the start sets the tone for the whole job. A well-organised site is a safer site, and it also tends to be a more efficient one — the crew can focus on the work rather than constantly managing vehicles trying to push through the cordoned zone.
Stage 3: Surface Cleaning and Preparation
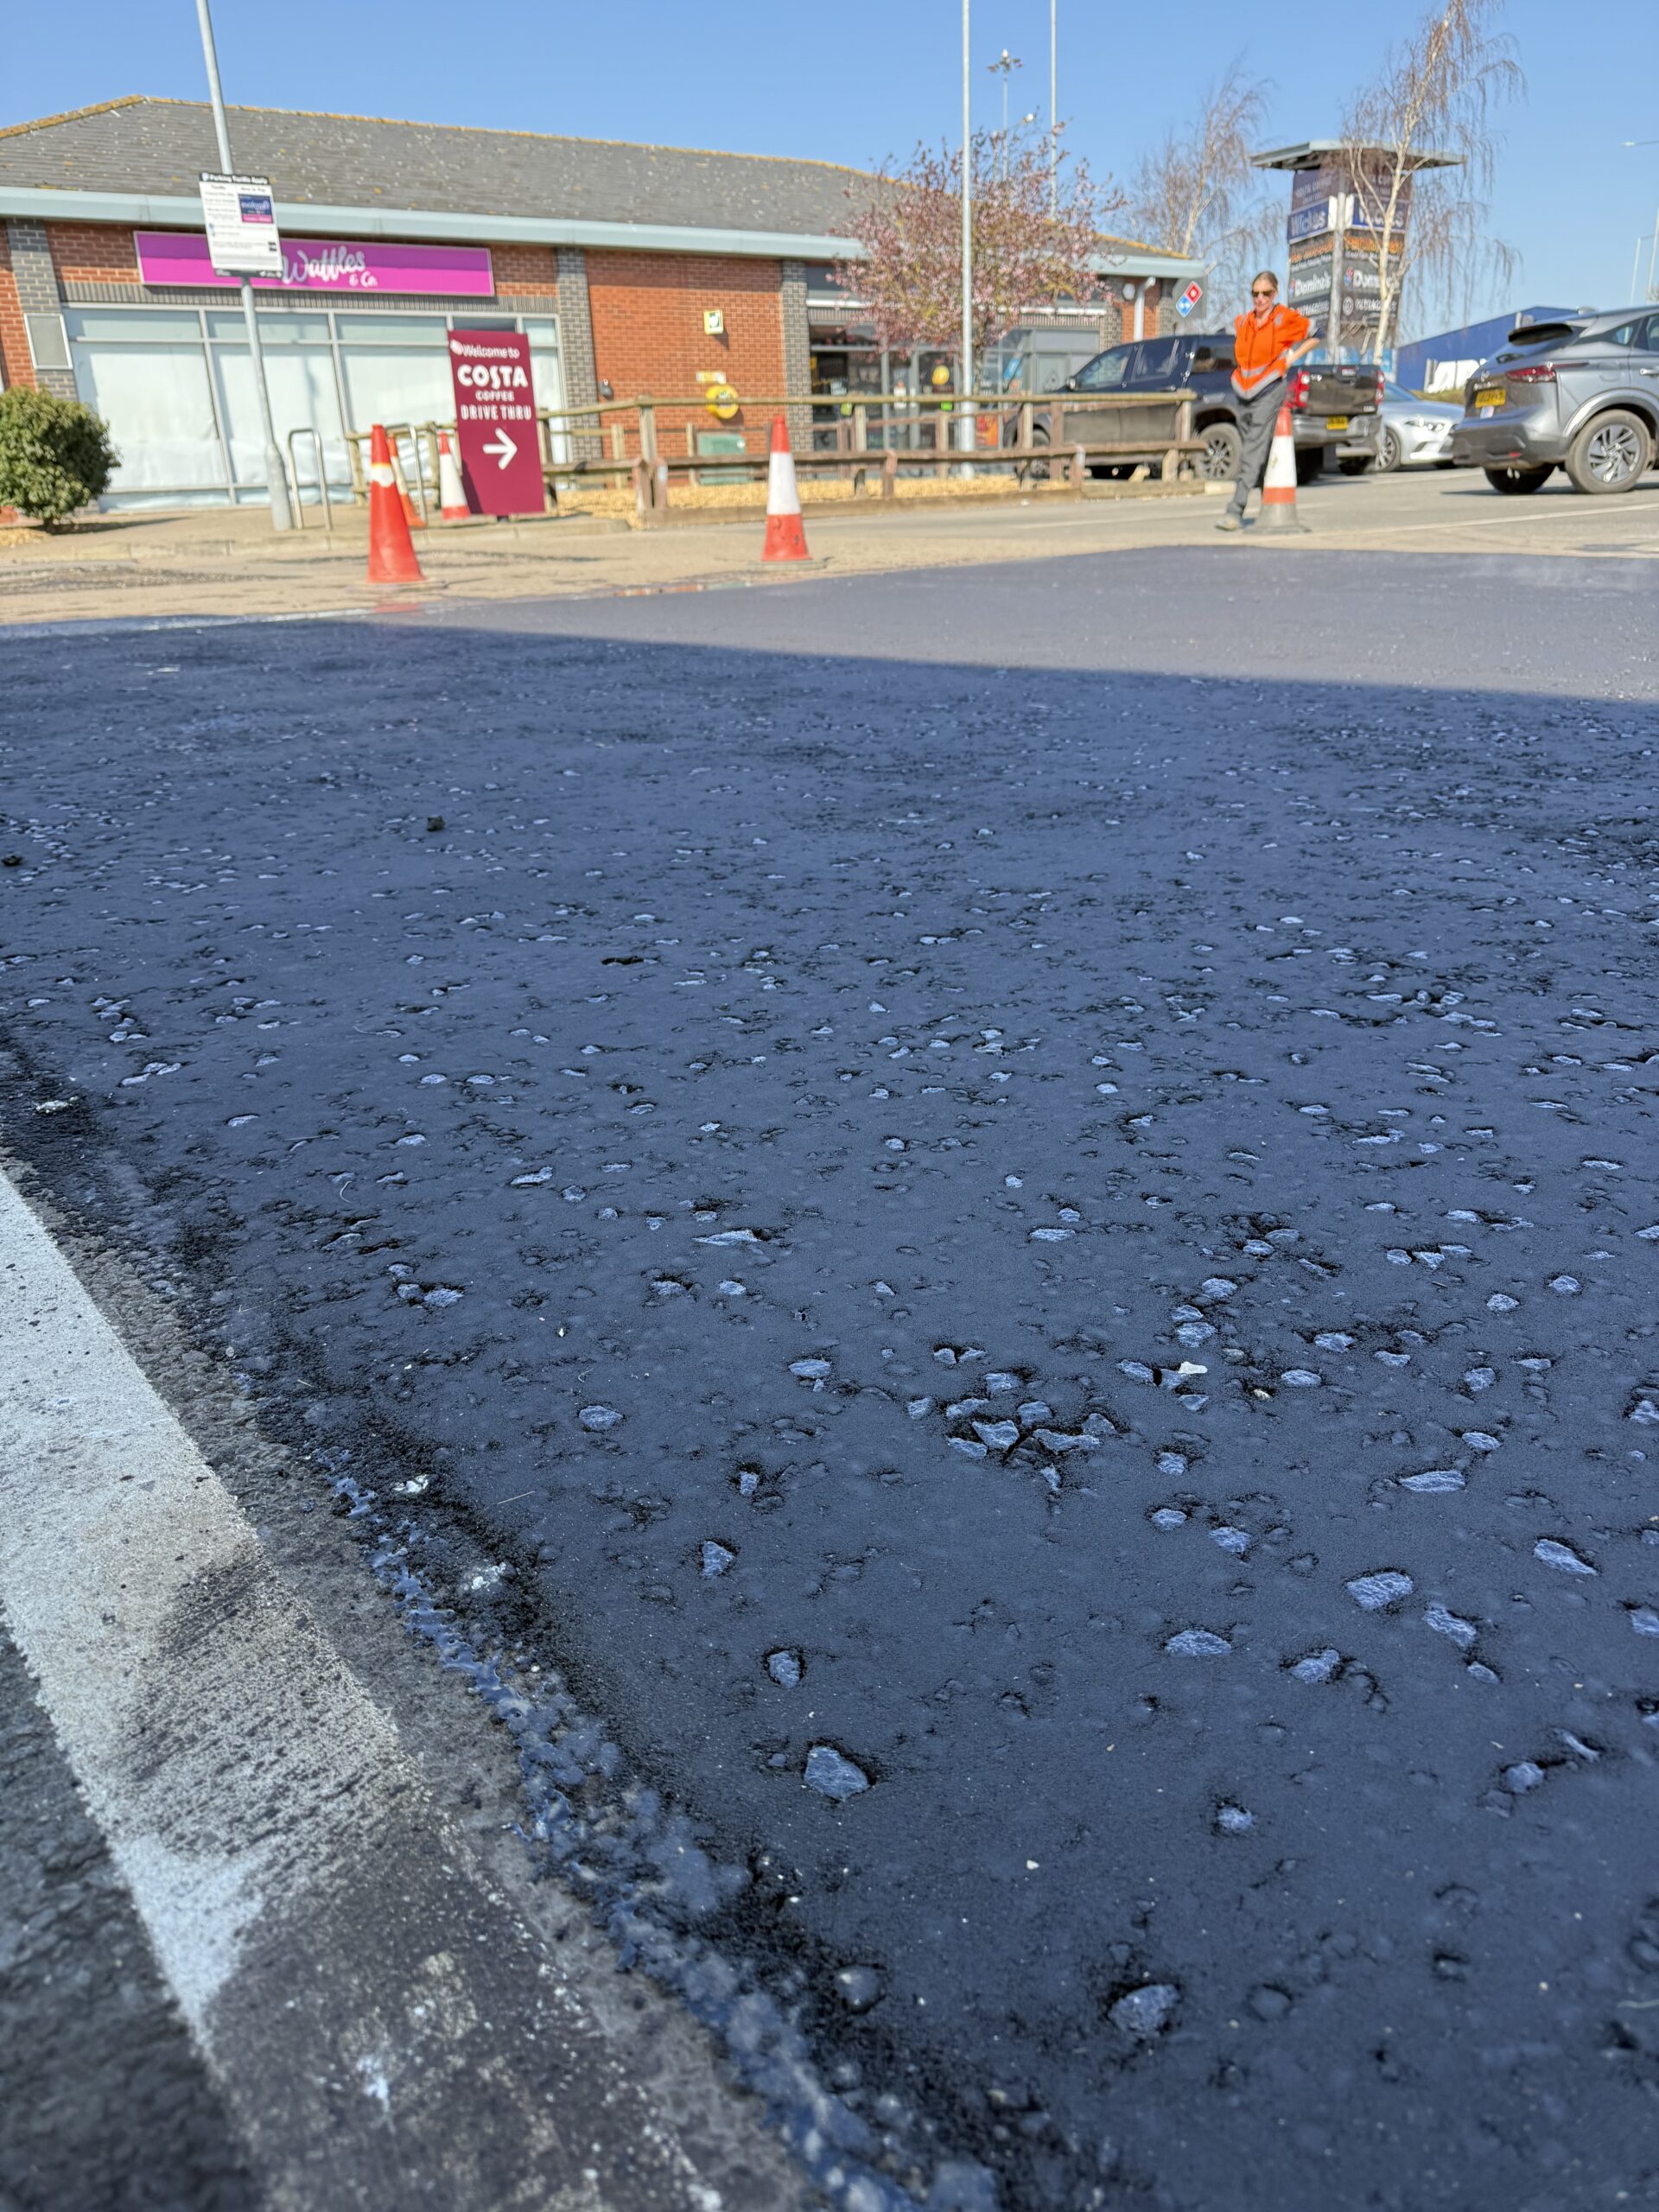
This is one of the most overlooked stages, and one of the most important. Tarmac needs to bond to what’s beneath it. Anything on the existing surface — loose debris, silt, vegetative growth, standing water — will compromise that bond and contribute to early failure.
The photographs from this project show a professional road sweeper working across the surface before works begin. This isn’t a courtesy clean; it’s a structural preparation step. Road sweeping removes the fine material that accumulates in surface voids and along edges, and it gives the crew a clear view of the existing surface condition — including any cracks, deformation or areas of concern that might not have been fully visible during the initial assessment.
On sites where the existing surface is heavily contaminated or where there’s significant vegetation in cracks, a more aggressive preparation may be needed — jet washing, mechanical removal of vegetation and its root system, and sometimes treatment of the cracks themselves before resurfacing proceeds.
The condition of what you can see at this stage is also a useful final check on the scope. If the preparation clean reveals more extensive damage than the original survey suggested, that’s the time to discuss it — not after the new material is down.
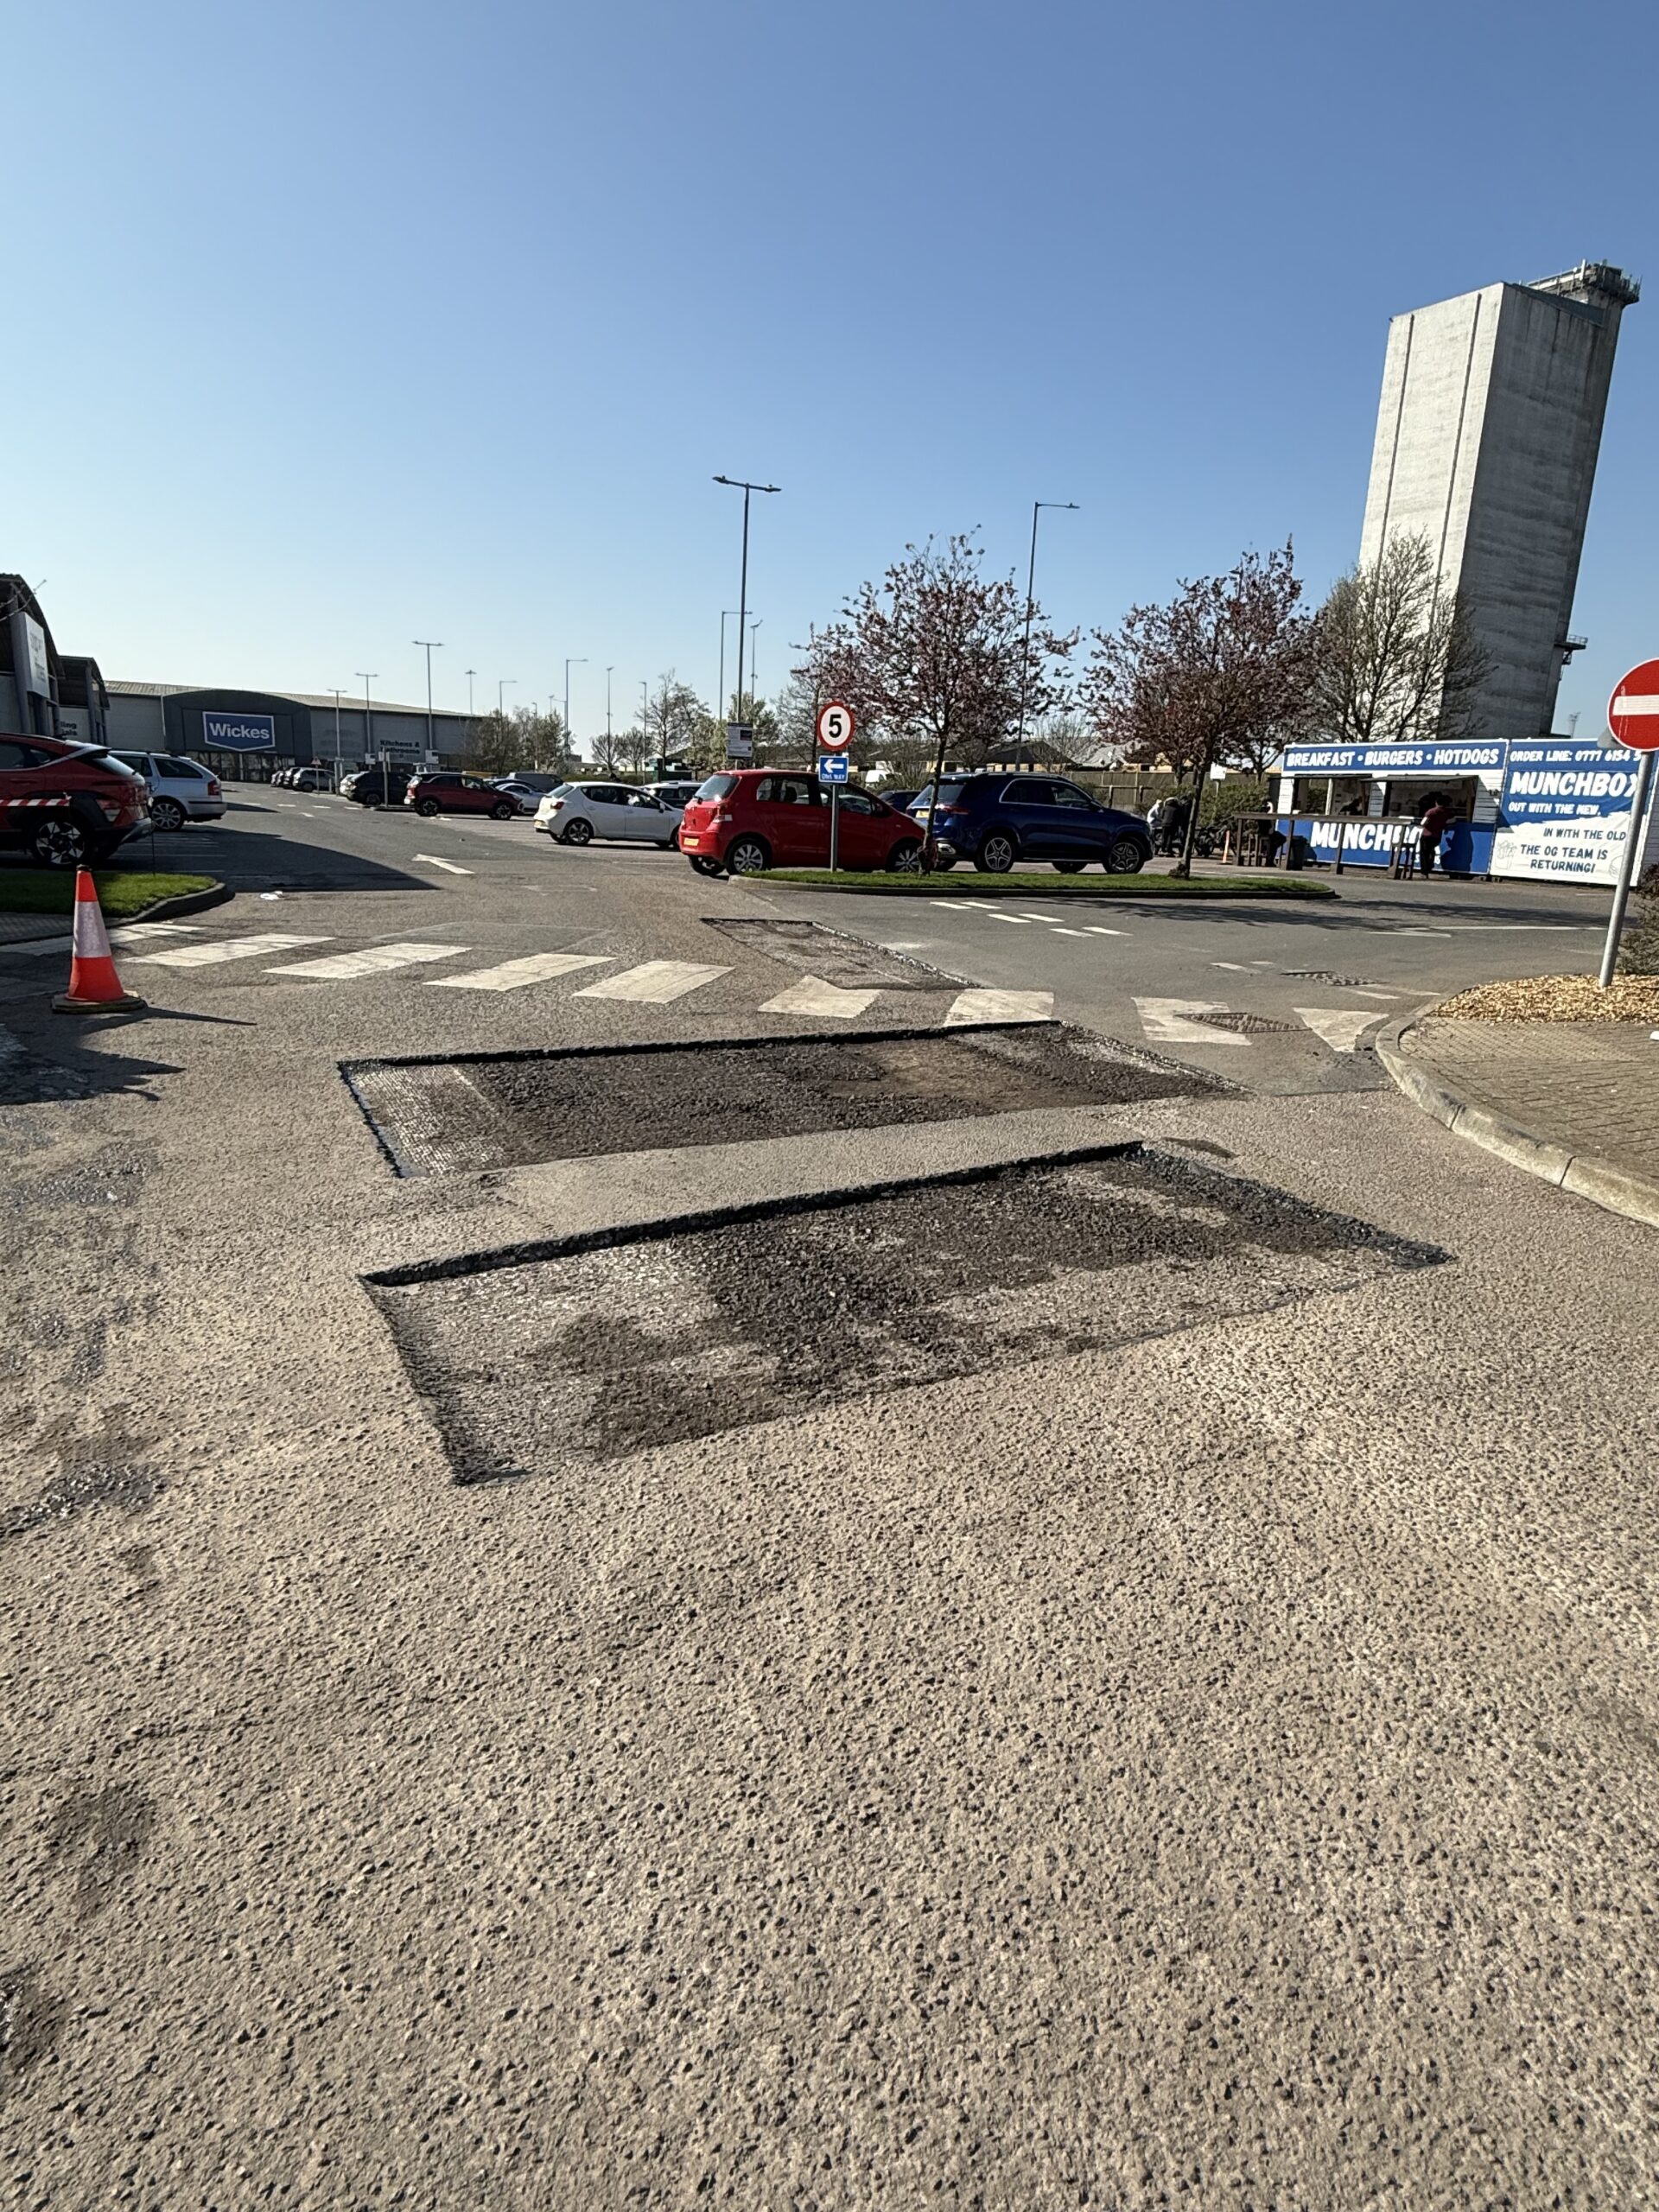
Stage 4: Milling (Where Required)
On projects where the existing surface is being removed rather than overlaid, milling — also commonly known in the industry as planing, or simply “the plane” — is the process that strips back the worn wearing course to create a clean, even substrate for the new material.
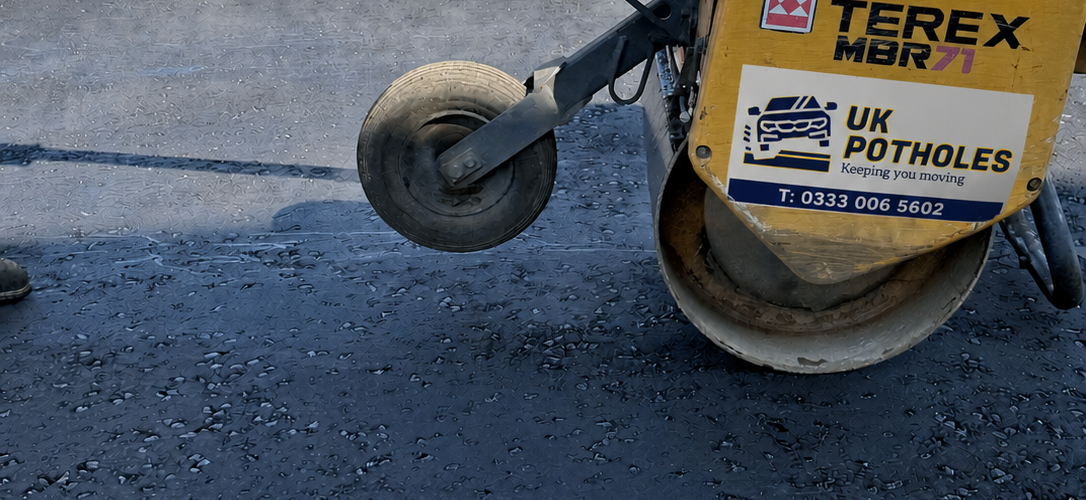
A cold planer — the Wirtgen machine visible in one of the site photographs — uses a rotating drum fitted with carbide-tipped picks to cut into the existing tarmac at a controlled depth, typically 40–50mm for a standard surface course removal. The milled material is either loaded directly onto wagons for recycling, or stockpiled on site if it’s being reused in lower pavement layers.
Milling serves several purposes. It removes the deteriorated material entirely rather than just covering it. It restores the correct surface levels relative to kerbs, drainage channels and adjacent surfaces — critical in a car park where even small changes in level affect water runoff. And it creates a textured, mechanically keyed surface that the new tarmac can bond to far more effectively than a smooth or oxidised wearing course would allow.
Where overlay rather than mill-and-resurface is the agreed approach, the preparation stage still needs to address any loose, delaminating or structurally unsound areas — these get cut out and made good before the new layer goes down. Overlaying problem areas without addressing them first is the single most common cause of premature failure in resurfacing work.
Stage 5: Tack Coat Application
If you were to point to the single most technically critical step in a surface-course resurfacing, it would be the tack coat — and it’s the one most frequently under-applied or skipped on lower-quality jobs.
A tack coat (also called a bond coat) is a thin application of bitumen emulsion sprayed onto the prepared surface immediately before the new tarmac is laid. Its purpose is to create a chemical and physical bond between the existing pavement and the new wearing course. Without it, the two layers effectively sit on top of each other rather than acting as a composite structure — and under repeated loading, the surface course will begin to slip, crack and delaminate.

The emulsion is applied by a calibrated spraying machine with a heated tank to maintain the correct viscosity. The application rate matters: too light and the bond is insufficient; too heavy and you get slippage. The standard rate for a surface course bond coat is typically in the range of 0.3–0.5 kg/m² of residual binder, but this varies depending on the porosity of the existing surface.
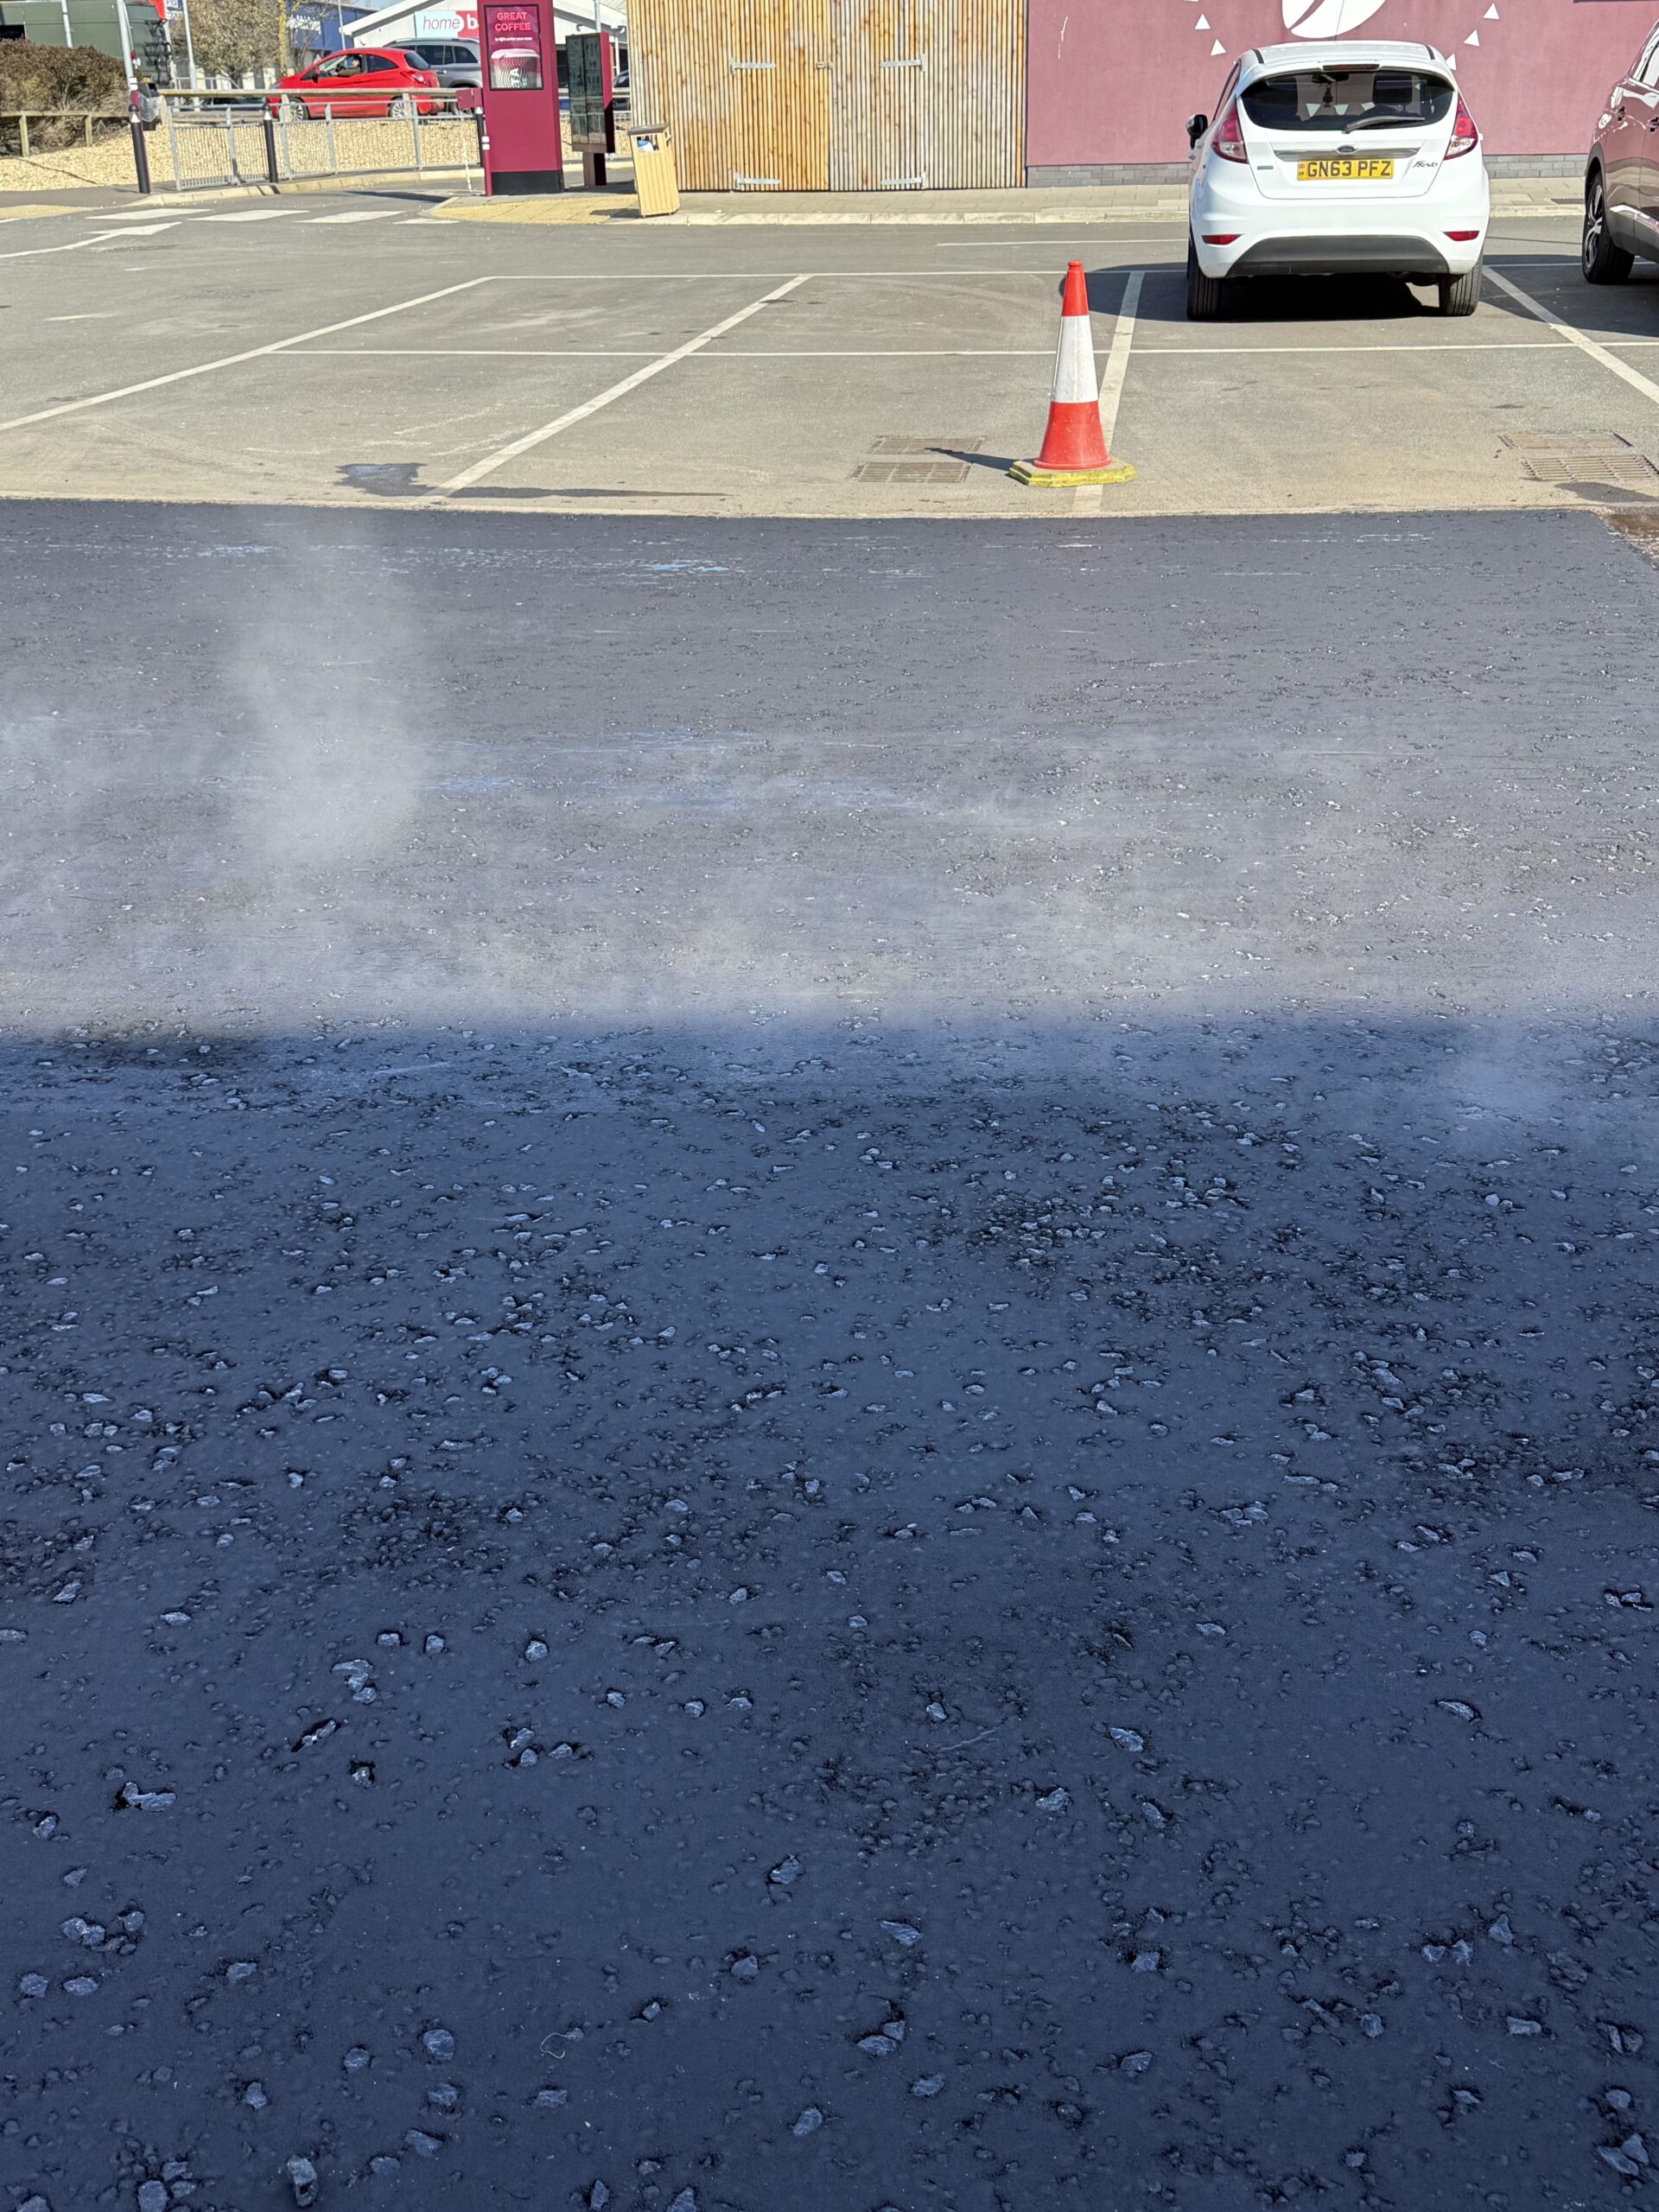
Crucially, the tack coat needs to have broken (transitioned from the initial brown emulsion state to the black residual binder state) before the tarmac is laid over it. Laying onto unbroken emulsion traps moisture and again compromises the bond. The steam visible in several of the photographs isn’t cause for concern — it’s actually a good sign, showing that the hot tarmac is making contact with a properly prepared, chemically active surface.
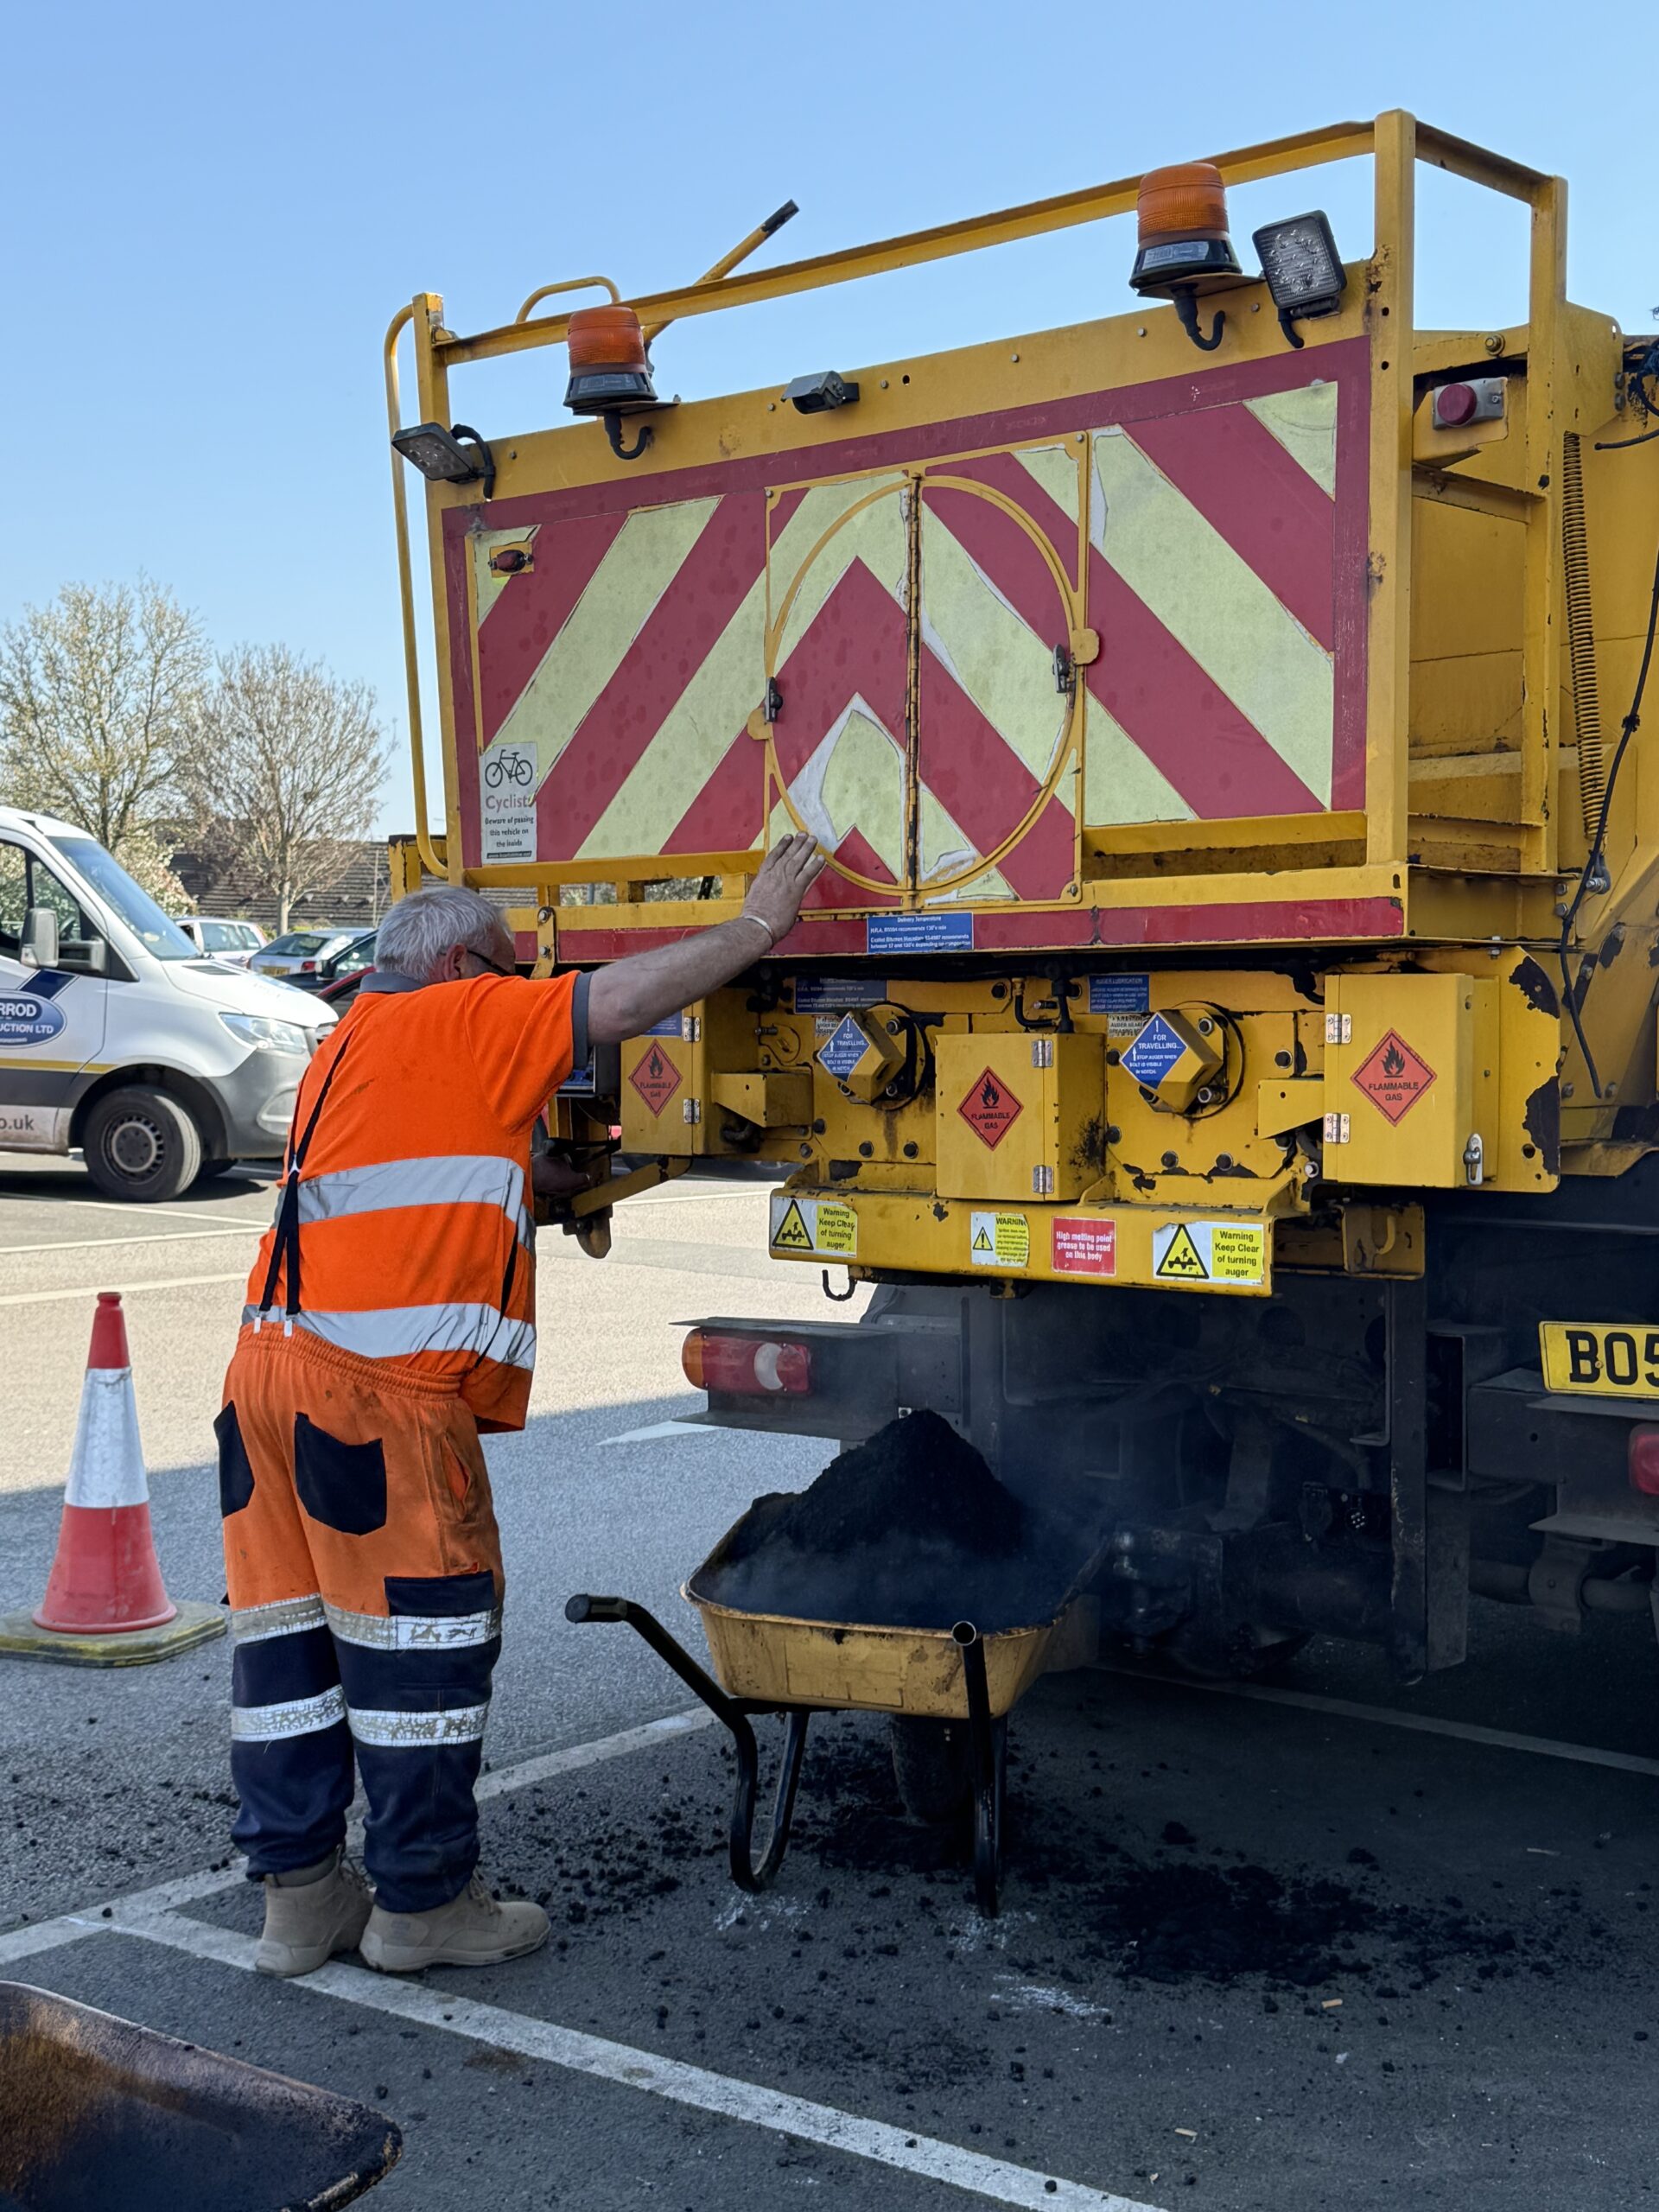
Stage 6: Tarmac Delivery and Handling
Hot-mix asphalt leaves the plant at between 140°C and 165°C, depending on the mix specification. From that point, the clock is running. Every minute the material spends in a wagon, a skip or a wheelbarrow is a minute of cooling — and tarmac laid below approximately 110–120°C cannot be compacted to the required density. The result is a surface full of air voids, which means water ingress, early ravelling and accelerated deterioration.
Efficient material handling on site is therefore more than just logistics — it directly affects the quality of the finished product. The photographs illustrate this well: the materials are being discharged from the wagon into wheelbarrows and moved quickly to the laying area, where they’re raked out without delay. This is how it should work. Material sitting in a wagon for twenty minutes while the crew deals with an access issue will have cooled to a temperature where quality is already compromised.
For the car park context shown in these photographs, a combination of direct discharge and wheelbarrow transfer is the practical approach. Large paving machines work brilliantly on open carriageway stretches, but in constrained car park environments — particularly around islands, kerb lines and awkward bay configurations, as well as tighter spaces where a paver simply cannot manoeuvre — hand-laying gives you the control you need to achieve good results in complex areas.
The Material Itself: What Is Tarmac, and What Goes Into It?
The word “tarmac” has become a catch-all term, but it’s worth understanding what the material actually is, because the specification matters enormously for durability.
Modern tarmac — more accurately called hot-mix asphalt — is a composite material consisting of mineral aggregate (crushed stone, sand and filler) bound together with bitumen, a viscous petroleum-derived binder. The aggregate provides structural strength and surface texture; the bitumen binds the aggregate particles together and provides flexibility and waterproofing.
For a commercial car park surface course, the standard specification in the UK is typically a close-graded asphalt to BS EN 13108-1, using a 10mm nominal maximum aggregate size. The 10mm mix is the correct choice for car parks and commercial access roads — it provides the durability and resistance to deformation needed under repeated vehicle loading. A 6mm mix is finer and smoother, but its application is generally limited to footpaths and pedestrian areas rather than trafficked surfaces. For higher-speed roads or routes with significant HGV movements, a coarser 14mm or 20mm binder course aggregate is used in the structural layers beneath.
The bitumen grade also matters. A 40/60 pen bitumen (the numbers refer to its penetration hardness) gives a stiffer binder suited to high-stress areas and warm conditions, while a 70/100 pen is softer and more appropriate for lower-traffic surfaces or sites in cooler climates. In a typical UK car park, 70/100 pen in a close-graded 10mm surface course is the standard choice — it gives the right balance of durability, flexibility and surface texture for the loading conditions.
The surface course is typically laid at 30–40mm compacted thickness. Beneath it, in a full pavement structure, sit the binder course (typically 60–100mm) and the sub-base (crushed stone or recycled aggregate at 150–300mm depth, depending on load requirements and ground conditions). In a resurfacing-only scenario, only the surface course is replaced, with the assumption that the lower layers are still structurally adequate.
Stage 7: Laying and Raking
Once the material is on the ground, it needs to be spread to a consistent, pre-determined loose depth — the “uncompacted” thickness that accounts for the reduction during rolling. For a 30mm compacted surface course, you’re typically raking to around 38–40mm loose depth, since close-graded asphalt compresses roughly 20–25% under rolling.
Hand-raking to a consistent depth across a complex car park area requires skill and experience. Experienced operatives use a combination of eye and level, working from fixed reference points (kerb tops, drainage channels, existing surfaces where the new tarmac needs to tie in). An uneven rake means uneven compaction, which means an uneven finished surface — visible as undulations that will also collect water.
The photographs show material being raked and spread while another operative is simultaneously managing the next discharge from the wagon. The speed and coordination of this stage directly affects the temperature at which the material reaches the roller — and therefore how well it compacts.
Edge details deserve particular attention at this stage. Where the new surface course meets an existing surface — either an adjacent area not being resurfaced, or a kerb — the joint needs to be neat, well-compacted and properly sealed. A badly finished edge joint is a water entry point, and water entry at a joint is one of the primary causes of edge failure and pothole formation in the following years.
Stage 8: Compaction
Rolling is where the laying work is consolidated into a finished surface. The objective is to achieve the specified air void content — typically 4–8% for a close-graded surface course — by driving out excess air from the mix and creating a dense, interlocked particle structure.
The roller visible throughout the site photographs is a single-drum pedestrian roller, ideal for car park work: manoeuvrable enough to work in tight spaces, with enough compactive effort to achieve the required density in a 30–40mm surface course layer. For larger open areas, a bigger twin-drum roller would typically be used alongside or instead, but in the constrained environment shown here this class of machine is the right tool.
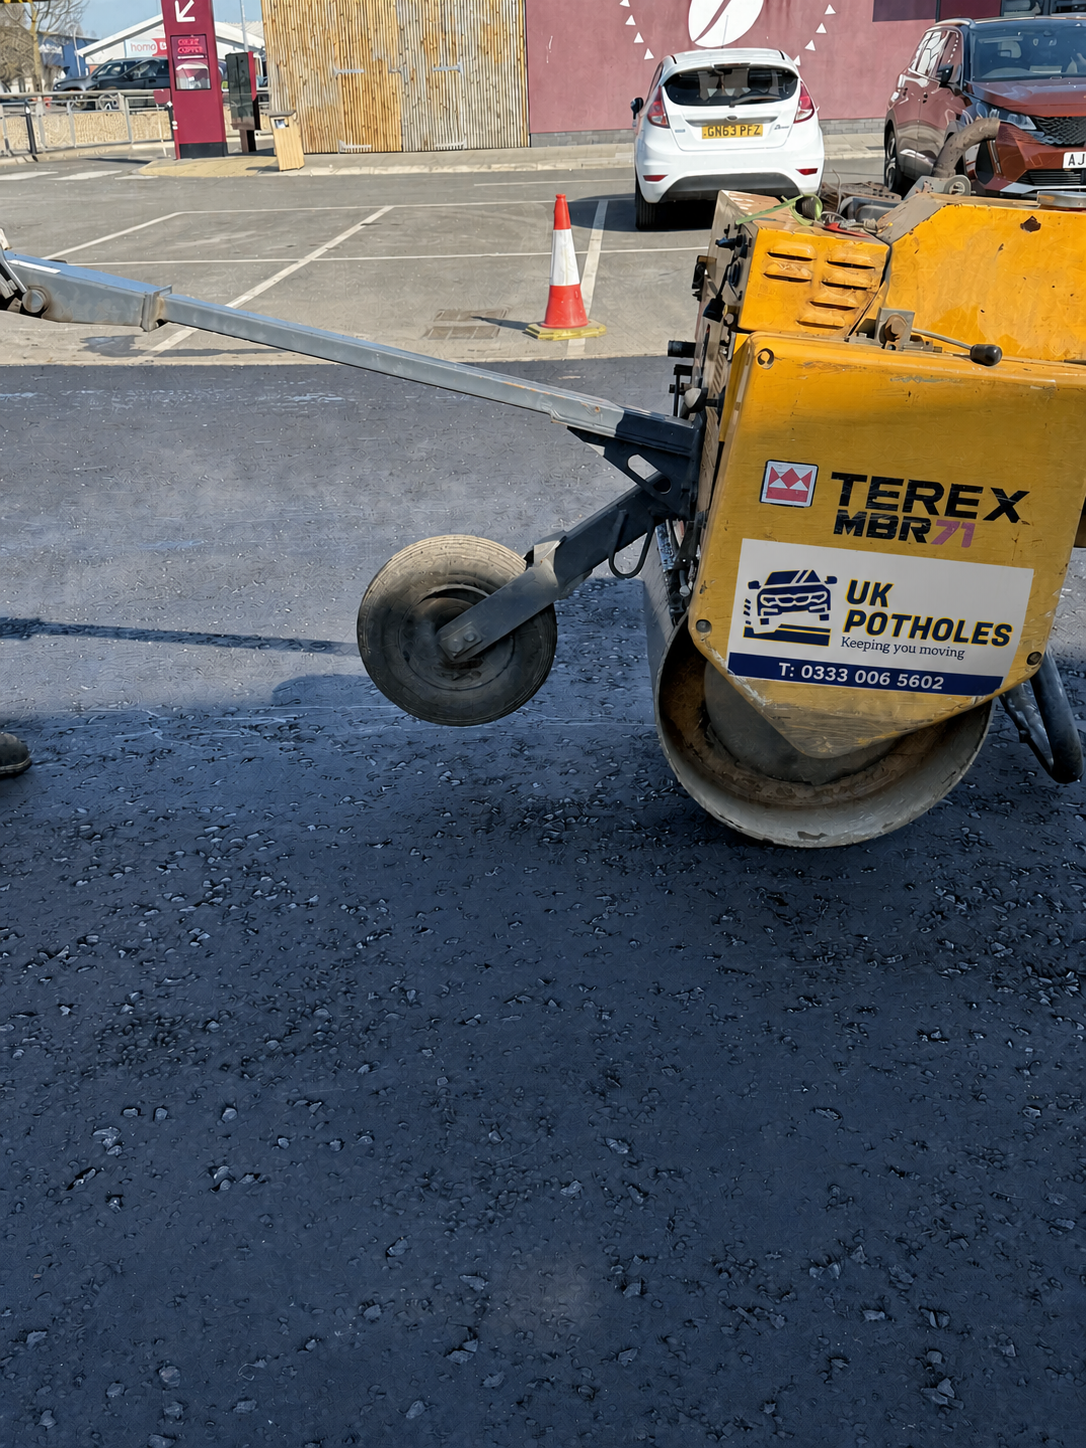
Rolling technique matters as well as equipment. The first pass or two should be static (vibration off) to avoid cracking the tender, freshly-laid mix; subsequent passes use vibration to drive compaction. The roller works longitudinally in overlapping strips, starting from the edges and working toward the centre. And critically, rolling must be completed while the material is still above approximately 80°C; below this temperature the bitumen has stiffened sufficiently that further rolling achieves nothing useful and can actually damage the surface texture.
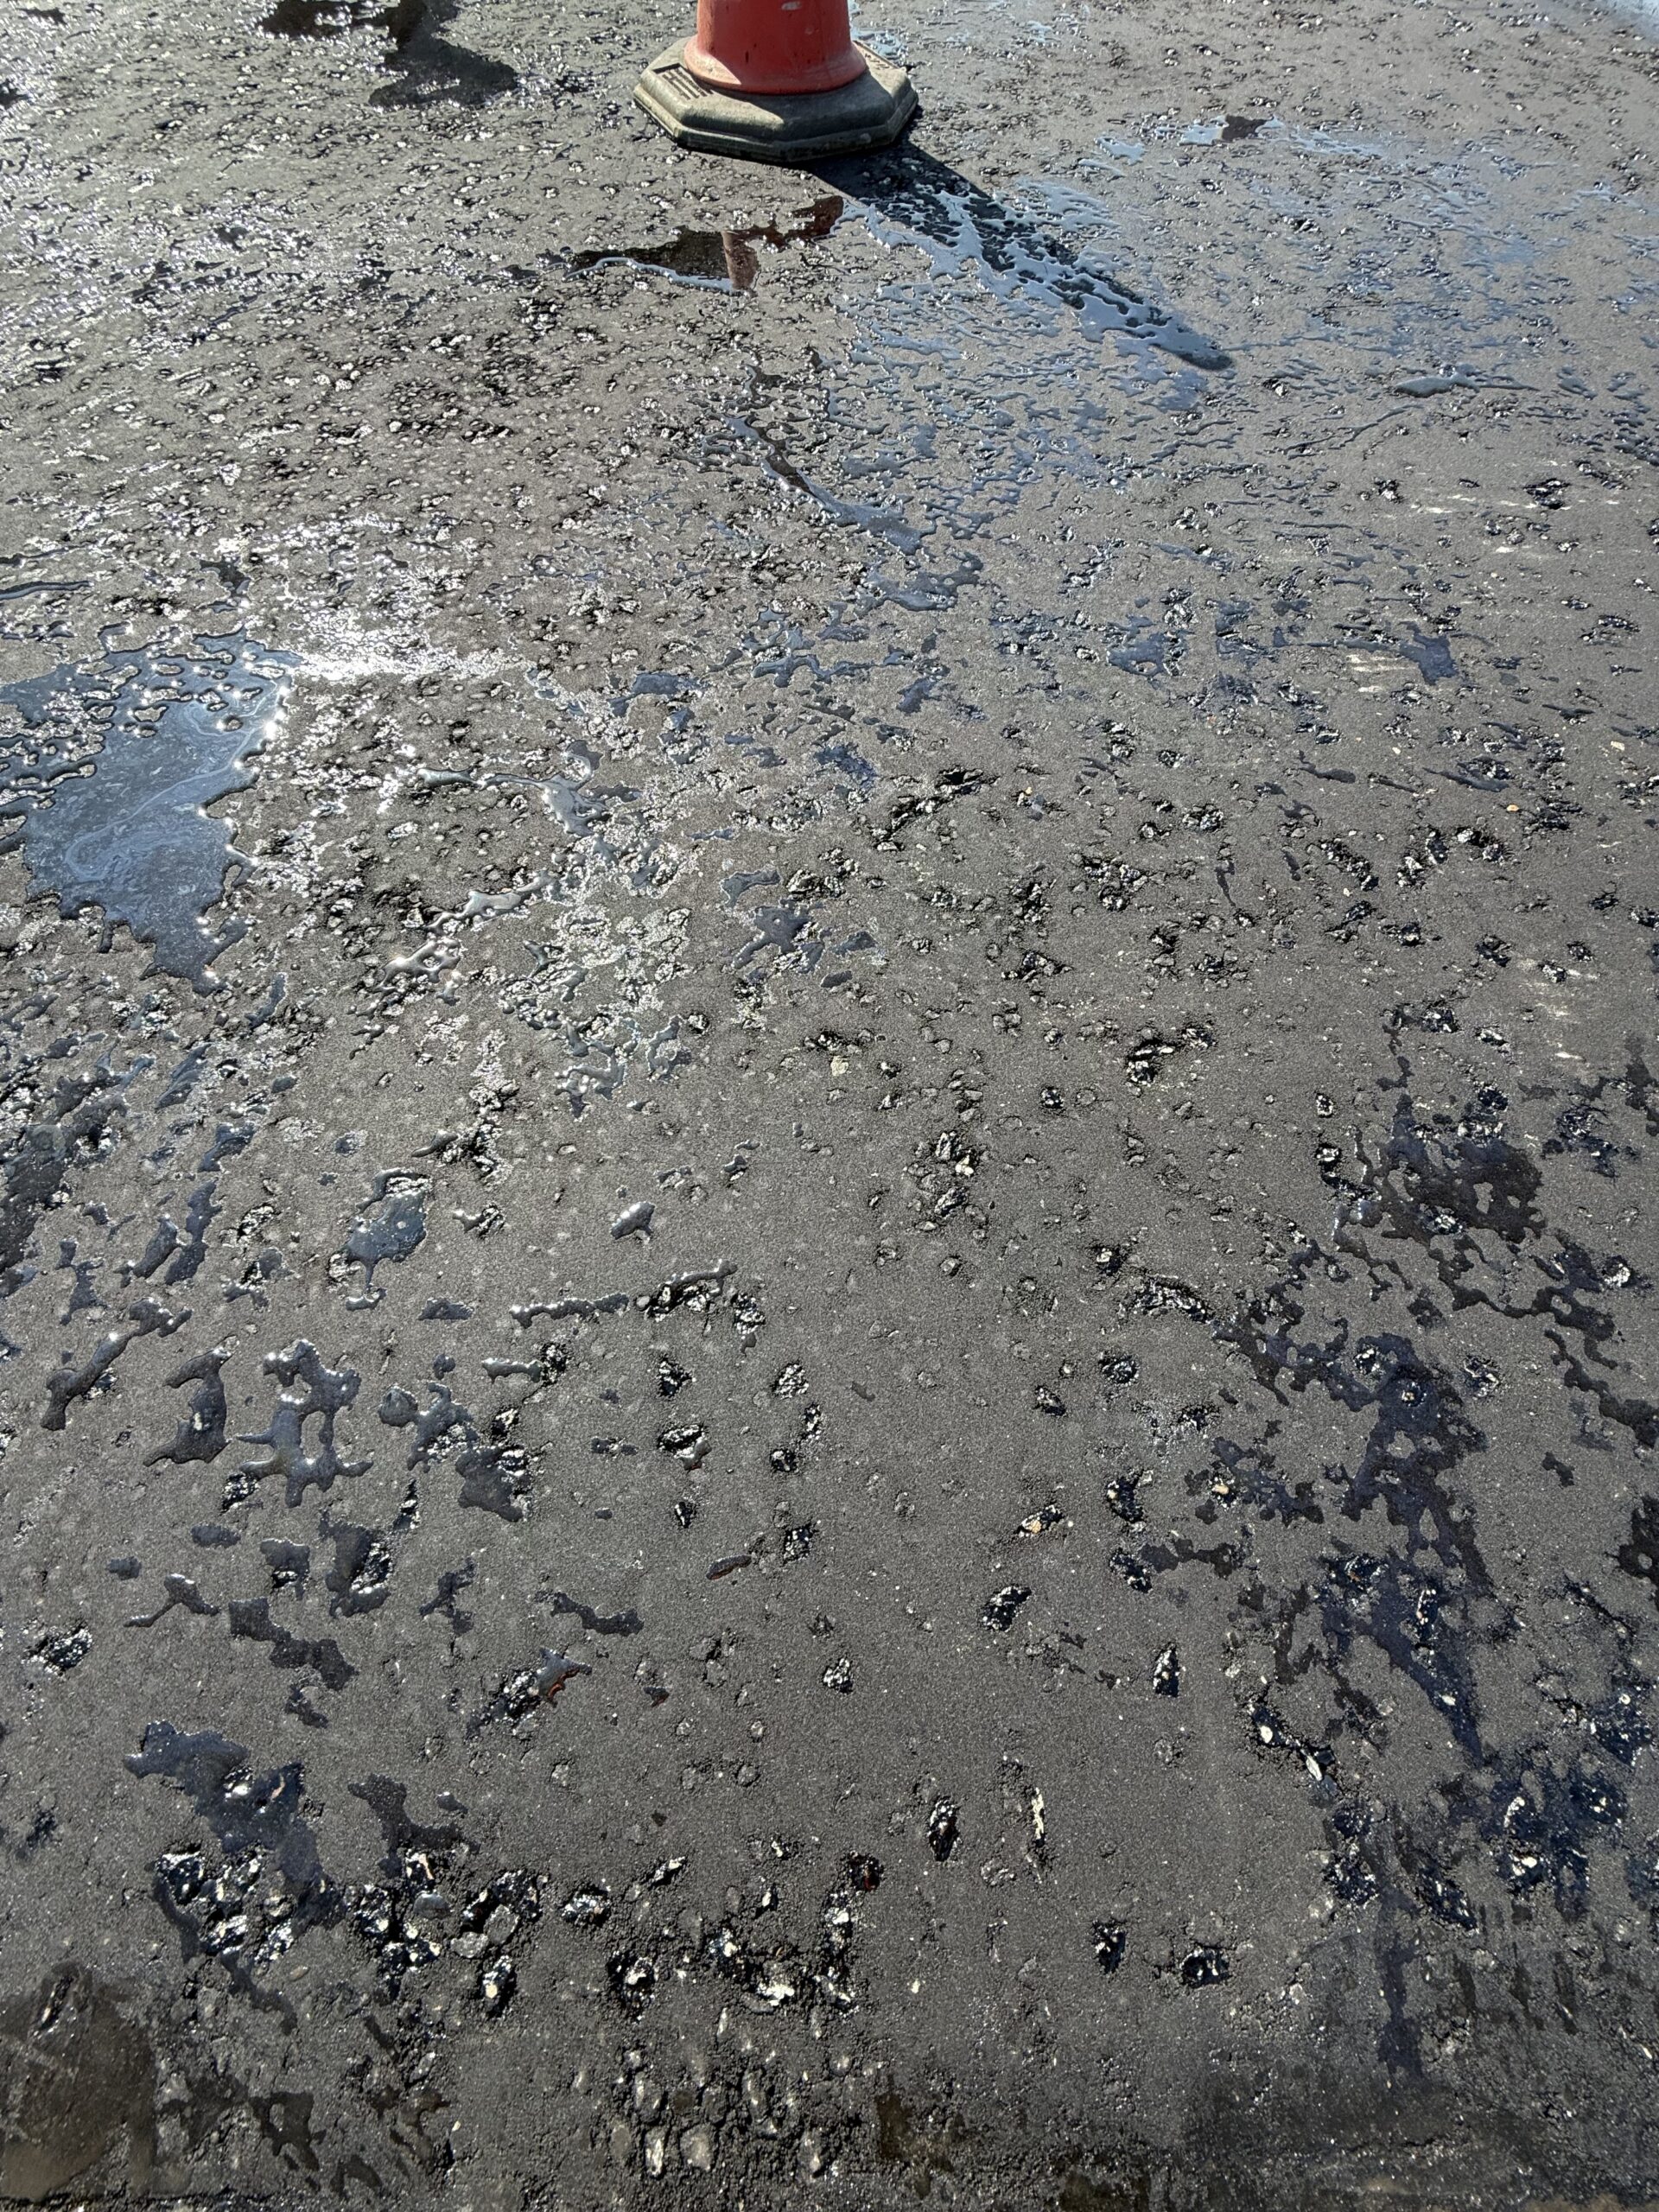
The steam rising from the freshly-compacted surface in the photographs is entirely normal — residual moisture from the tack coat and ambient humidity being driven out by the heat of the mix. A well-compacted surface at this stage should look tight, even and consistent in texture, with no segregated areas, no aggregate pockets and no roller marks.
Stage 9: Joints and Tie-ins
Where two areas of resurfacing meet — or where new tarmac meets existing — the longitudinal joint is a point of particular vulnerability. Correctly formed joints are raked and compacted to achieve full density right to the edge. Where a cold joint is unavoidable (for example where work stops and restarts the following day), the cold edge should be painted with hot bitumen and overlapped slightly by the new run to prevent a visible step or water trap.
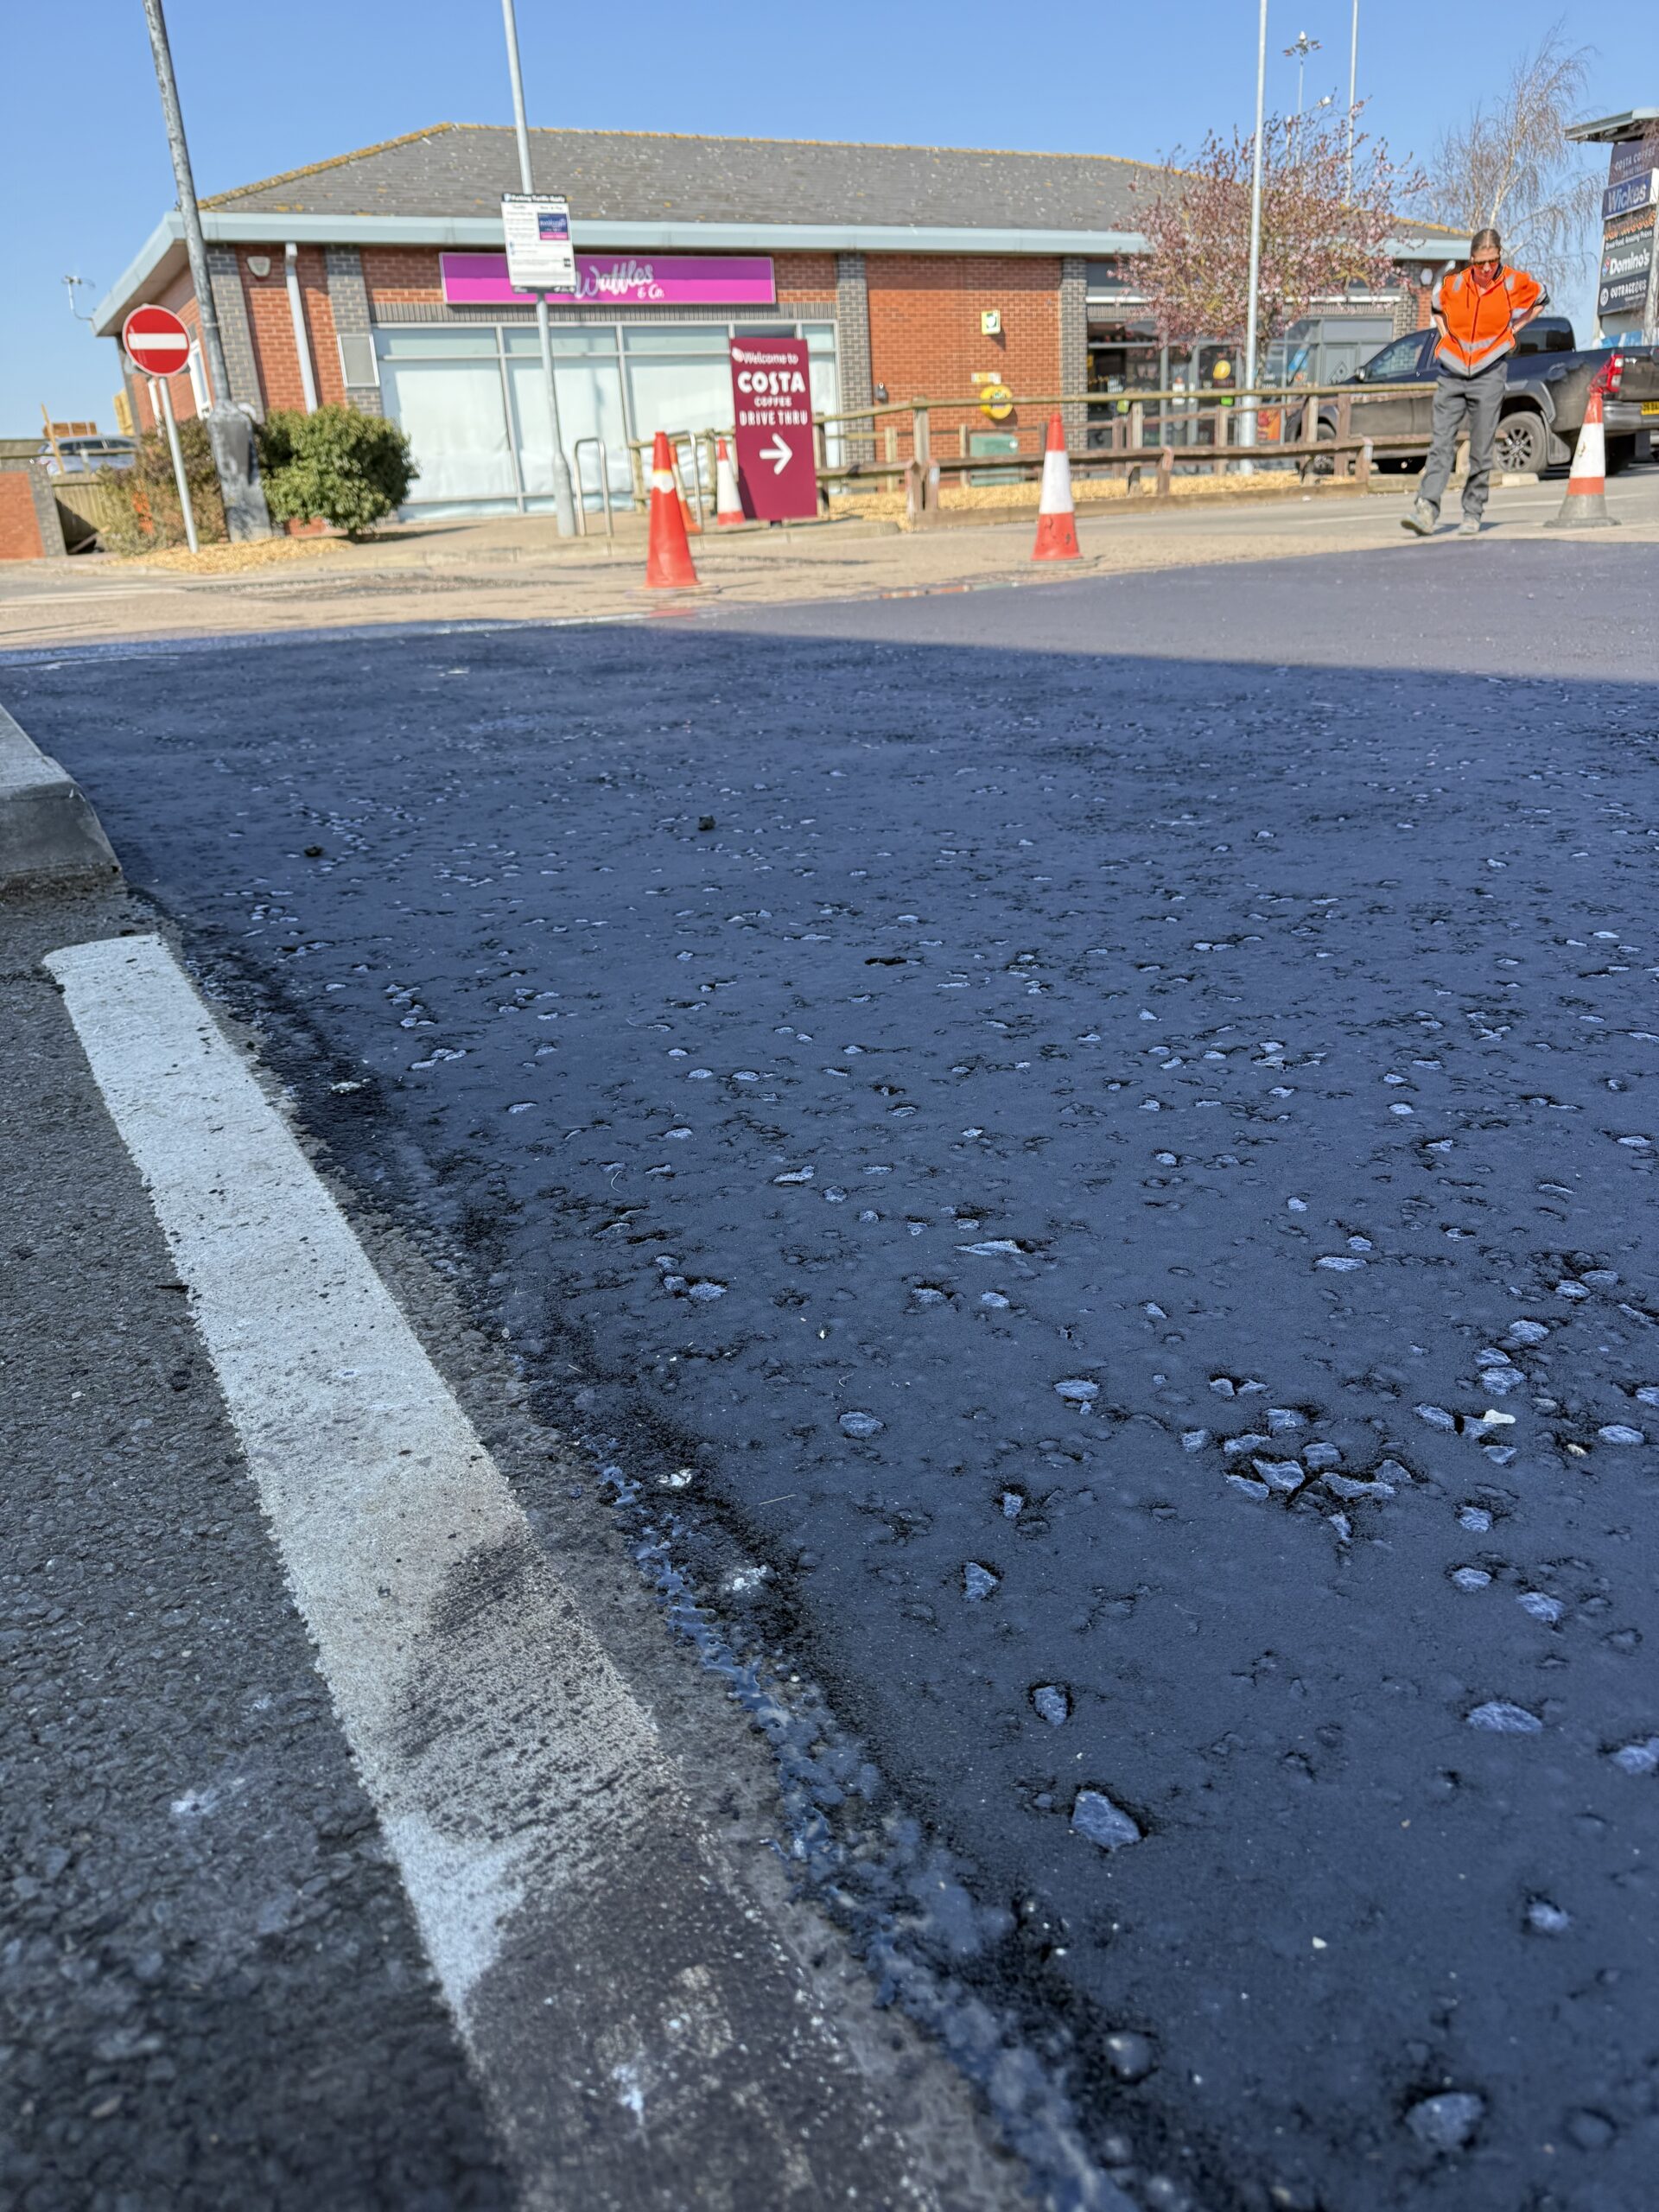
In the photographs, you can see the clear demarcation between the new dark surface course and the existing lighter, older asphalt at the boundary of the works. This tie-in detail is handled with raking and careful rolling to avoid a proud edge or a depression — both of which would be noticeable underfoot and, in a car park context, would attract water and early edge deterioration.
Stage 10: Final Check and Handover
Once rolling is complete and the surface has cooled to ambient temperature — typically within one to two hours for a surface course layer in UK conditions — a final walk-over is carried out before the area is reopened to traffic.
This involves checking the surface visually for any defects: segregation, roller marks, edge defects, or areas that look visually different in texture (which can indicate localised temperature issues during laying). Level checks against the reference points established during the survey confirm that drainage falls have been maintained correctly. And the joint details are inspected to ensure there are no open cracks or raised edges.
Only when the surface has passed this final check — and reached a temperature where it can carry traffic without deformation — should the cones come down and the car park reopen. Rushing this stage by reopening to vehicles while the surface is still warm risks rutting in the surface course before the bitumen has fully stiffened.
At UK Potholes, we don’t consider a job complete until we’ve done this walkover properly. It’s the last opportunity to identify and correct anything before the client takes the surface back — and it’s also the point at which we can hand over a record of the works that the client can retain as part of their site maintenance documentation.
How Long Should a Resurfaced Car Park Surface Last?
Done correctly — proper preparation, correct specification, adequate compaction, clean joints — a close-graded surface course on a well-maintained commercial car park should give you 15 to 20 years of serviceable life before another resurfacing is needed. In practice, the range is wider than that, because site-specific factors play a significant role: drainage quality, the proportion of HGV versus car traffic, climate exposure and whether the surface receives any maintenance intervention (crack sealing, pothole repairs) during its life.
What shortens that lifespan consistently is poor preparation, under-compaction, inadequate tack coat and rushed joint work. All of these failures are visible to an experienced eye within two or three years, as cracking, delamination and surface ravelling become apparent. The material cost of tarmac resurfacing is roughly similar whether the job is done properly or not — the difference is in the time and care taken at each of the stages above.
Choosing the Right Resurfacing Contractor
The process described in this article isn’t complicated, but it requires the right equipment, properly trained operatives, and a commitment to doing each stage correctly rather than cutting time wherever possible. The difference between a 5-year surface and a 15-year surface often comes down to a few decisions — the application rate of the tack coat, the speed of material transfer from wagon to ground, the temperature at which rolling is completed.
At UK Potholes, we carry out tarmac resurfacing for commercial properties, retail parks, industrial estates, local authorities and housing associations across the UK. We’re CHAS accredited, fully insured, and every project comes with a formal written scope of works and a guarantee on the completed surface. If your car park or access road is showing the early warning signs — cracking, surface ravelling, edge deterioration — the right time to address it is before those problems progress to full structural failure.
Get a Free Site Assessment
Not sure whether your surface needs resurfacing or a targeted repair? We’ll come to site, assess it honestly, and give you a written quotation — no obligation, no sales pressure.